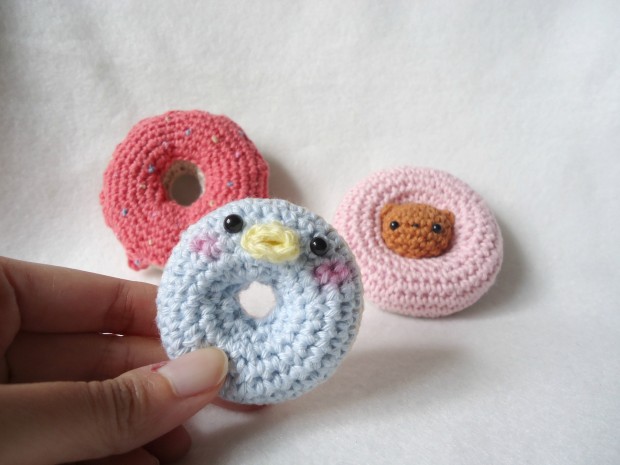
So finally the day has come where I (finally) release these critters to the world! I had a few setbacks and the previous goal in instagram was only almost reached, so instead of the kitty donut pattern I’m releasing a mini version of it which you can freely make into any character you like. Here I made a penguin one as an example, but of course you can make them into anyone, or anything.
Oh, speaking of goals, I’ve reached a small milestone in Instagram so I’m having a giveaway! just search my username @judithchenart or simply click the instagram button on the right side of this page 🙂
Tips: bouillon stitch embroidery technique is an easy way to make small, dainty sprinkles that actually pops out! The cream was basically the same pattern gone halfway, finished with random hdc to tc on chains (so they look like dripping cream) then sewn on. This pattern, however used the easiest version where you just switched colors. Cause as always, I really wish that everyone could try out my patterns. But of course, you may request on what free pattern should I share next (so far the highest request is Rilakkuma).
Oh by the way, if you scroll quite waaaaaay below you will find a German version of this pattern! I would still suggest to do invisible decrease instead of decrease in the German pattern version, however there is no such term in German, I think…(please do correct me if I’m wrong).
Alright, without further ado, here you go:
Materials:
- Rico Baby cotton yarn 50 g/125 m
- 3 mm crochet hook
- Polyester fiberfill
- Plastic/safety eyes, 5 mm
Terms:
sl st: slip stitch
sc: stitch
inc: increase
inv dec: invisible decrease (as always, might be replaced with decrease or sc2tog if preffered)
FO: Fasten off
Pattern:
ch 14, slip stitch to join them. Do mind not to twist them. Start with cream or brown yarn
R2: sc, inc (21)
R3: sc around (21)
R4: 2 sc, inc (28)
R5: sc around (28)
R6: 3 sc, inc (35)
R7: sc around, switch to blue or desired color (35)
R8: sc around (35)
R9: 3 sc, inv dec (28)
R10: sc around (28)
R11: 2 sc, inv dec (21)
R12: sc around (21)
R13: sc, inv dec (14)
FO. Leave long tail to sew.
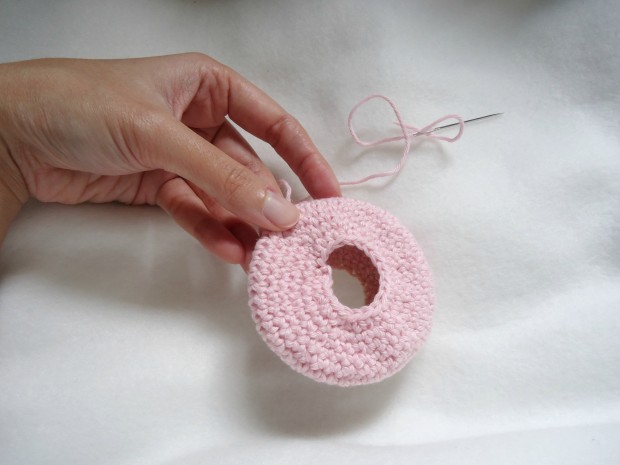
finished donut before stuffing
Bonus: beak (if you want to make penguin like pictured. any animal or character is possible)
R1: MR (4)
R2: sc, inc (6)
FO. Leave long tail for sewing
Assembly:
Start stitching the middle part, stuffing a small part and keep repeating until all parts are stuffed evenly. Sew close and weave in the ends.
………………………………………………………………………………………………………………….
Materialien:
- Rico Baby Baumwolle 50g / 125m
- 3 mm Häkelnadel
- Füllwatte
- Plastikaugen (Halbperlen schwarz), 5 mm
Abkürzungen:
Kettm: Kettmasche
FM: Feste Masche
Lftm: Luftmasche
zun: Zunehmen
abn: Abnehmen
Anleitung:
Mit brauner oder creme Farbe. 14 Luftmaschen, zusammen verbinden mit Luftmasche.
R2: FM, zun (21)
R3: FM in jede Masche (21)
R4: 2 FM, zun(28)
R5: FM in jede Masche (28)
R6: 3 FM, zun (35)
R7: FM in jede Masche, die Farbe wechseln (Blau für Pinguin) (35)
R8: FM in jede Masche (35)
R9: 3 FM, abn (28)
R10: FM in jede Masche (28)
R11: 2 FM, abn (21)
R12: FM in jede Masche (21)
R13: FM, abn (14)
Mit langem Faden abgeschneiden.
Bonus: Schnabel (für Penguin. Mit dieser Anleitung sind auch andere Tiere möglich.)
R1: 4 FM im einem magischen Ring
R2: FM, zun (6)
Mit langem Faden abgeschneiden.
Fertigstellen:
Nähe ein kleines Stück, stopfe dieses mit Füllwatte aus und so weiter. Den Schnabel vernähen und die Augen ankleben.

I need to try this pattern out 🙂
yay!! please do show me the result 🙂